
Bye-Bye Back Pain
July 2004
By Selene Yeager
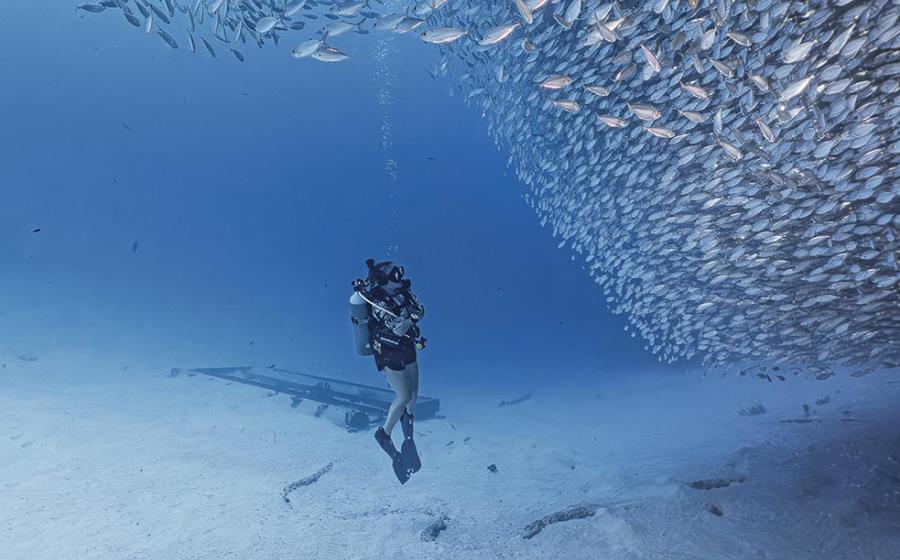
Before your next dive, take a moment to educate yourself about the bends. No, not decompression illness. We mean the dozen or so bends you'll do between the beach and the boat, hauling gear, slinging cylinders and otherwise wreaking havoc on that support system called your spine. The American Academy of Orthopaedic Surgeons says four out of five Americans will suffer a bout of back pain at least once in our lives. And sources say achy backs top the complaint list of divers around the globe.
"Everywhere I dive, I hear people complaining that their backs hurt," says physical rehabilitation specialist Mary Ann Everhart-McDonald, M.D., of Columbus, Ohio. "The reason is partly because divers often don't do much physical preparation to get fit to dive, and partly because of improper lifting technique and poor posture during the dive itself," she says.
Strong to the Core
Scuba diving uses every muscle from those in your regulator-gripping mandibles to the ones in your flippered, finning metatarsals. The girder that supports everything in between is your core--the abdominal, oblique (side torso) and back muscles. This central framework transfers power from your upper body to your lower body and supports you as you lift, walk, climb and swim. Unfortunately, in too many cases, this essential stabilizing structure is also our weakest link.
To bolster this support system, physical therapists recommend what they call "lumbar stabilization," or "core training" exercises. These moves target your torso from your shoulders to your hips, especially the ab, oblique and back muscles. When performing these exercises, be sure to keep a neutral spine. You shouldn't arch, sway or deliberately try to flatten your back. Rather, maintain a natural spinal curve that is comfortable. Perform two sets of the following exercises, two to three days a week, but not on consecutive days.
THE HOVER. Lie facedown on the floor with your upper body propped on your forearms with your elbows directly beneath your shoulders. Your torso should be up off the floor so your body is in a straight line, supported by your forearms and toes. Your back should not arch or droop. Hold 10 to 20 seconds.
SIDE PLANK. Lie facedown on the floor with your upper body propped on your forearms with your elbows directly beneath your shoulders (as in the hover). Roll your body over to the right side, supporting your torso on your right forearm and raising your hips and stacking your feet so your body forms a straight plank. Put your left hand on your hip. Hold five to 10 seconds. Then switch sides.
ROLL LIKE A BALL. Sit on the floor and hug your knees to your chest. Balance on your tailbone and lift your feet, pointing your toes down toward the floor. Pull your abdominal muscles in and roll back onto your upper glutes and lower back. Contract your abs and pull yourself back to start. If the move is too difficult, loosen your arms, so your knees are pulled less tightly to your body. Perform 10 rolls.
LYING LEG DROP. Lie on your back with your hands behind your head and your legs extended and lifted directly over your hips so they are perpendicular to the floor. Turn feet out slightly. Lift your head off the floor and look toward your legs. Inhale and lower your legs toward the floor about six inches. Exhale, and return to start. Start with four reps, and then work up to eight.
TORSO LIFT. Lie facedown on the floor with your hands under your chin, palms down, and elbows pointed out to the sides. Keeping your hips pressed to the floor, lift your head, chest and arms about five to six inches off the floor. Pause, then lower. Repeat for eight to 10 reps.
Loosen Up
Strength without flexibility is like chips without the fish--only half the story. For pain-free diving, concentrate not just on stretching the usual suspects like the hamstrings and calves, but also the muscles that need to be flexible for finning, advises sports conditioning coach Harvey Newton, creator of the book and video set Explosive Lifting for Sports (Human Kinetics, 2002). "People automatically flex forward, as in touching their toes, when they stretch. But scuba diving puts you in the reverse position, with your feet floating up, so your body forms a U in the opposite direction," he says. "If you're not conditioned for that, you can end up pretty sore by the end of your dive." The following stretches will help. Perform each stretch twice, holding for 30 seconds. You can perform these every day.
COBRA. Lie facedown with your feet together, toes pointed and your hands on the floor, palms down, just in front of your shoulders. Lift your chin and gently extend your arms, lifting your upper body off the floor as far as comfortably possible. If you feel any strain in your back, alter the pose so that you keep your elbows bent and forearms on the floor. This move targets the thigh, front hip and abdominal muscles.
FIGURE 4 BEND. Sit in a chair with your legs bent 90 degrees and feet flat on the floor. Cross your right ankle over your left knee, so your calf is parallel to the floor and your right knee is pointing to the right. Keeping your back straight, lean forward from the hips until you feel a stretch deep in your right glute muscle. This move stretches the piriformis, a small muscle that runs from the base of the spine and connects to the thighbone.
LUNGE STRETCH. Get in the lunge position, with your right leg bent 90 degrees in front of you and your left leg extended behind you with the knee resting on the floor. Your torso should be upright. Keeping your back straight, press your body forward so you feel a stretch in the front of your hip. Hold; then repeat on the opposite side. This stretches the psoas, the muscle that connects your back with the front of your hip.
Watch Your Back
To keep the chiropractor at bay, use these techniques when lifting and carrying heavy gear.
 |
||
| Illustration by Thomas-Bradley Illustration & Design. |
> Cradle the load. Carry equipment as close to your body as possible. Instead of trying to strong-arm your tank with one hand, lift it with both hands and carry it across your chest in both arms like a baby.
> Lift with your legs. Bend from your legs and pick things up using your strong quad, hamstring and glute muscles. Don't bend from the waist and hoist things with your back.
> Wear the weight. The easiest, and safest, way to carry your tank, BC and weight belt is wearing them.
> Integrate it. If your buoyancy check shows you need lots of weight, consider a BC with integrated weights to disperse the load.
> Buddy up. Rather than using the sling-and-struggle method to don your BC, ask your buddy to hold it, so you can put both arms in and settle it before bearing the load. If your buddy is unavailable, place the tank on a bench for support.
> Undress in the drink. If you're susceptible to back woes, take your gear off in the water and hand it up to someone on the boat before reboarding.
July 2004
By Selene Yeager
Before your next dive, take a moment to educate yourself about the bends. No, not decompression illness. We mean the dozen or so bends you'll do between the beach and the boat, hauling gear, slinging cylinders and otherwise wreaking havoc on that support system called your spine. The American Academy of Orthopaedic Surgeons says four out of five Americans will suffer a bout of back pain at least once in our lives. And sources say achy backs top the complaint list of divers around the globe.
"Everywhere I dive, I hear people complaining that their backs hurt," says physical rehabilitation specialist Mary Ann Everhart-McDonald, M.D., of Columbus, Ohio. "The reason is partly because divers often don't do much physical preparation to get fit to dive, and partly because of improper lifting technique and poor posture during the dive itself," she says.
Strong to the Core
Scuba diving uses every muscle from those in your regulator-gripping mandibles to the ones in your flippered, finning metatarsals. The girder that supports everything in between is your core--the abdominal, oblique (side torso) and back muscles. This central framework transfers power from your upper body to your lower body and supports you as you lift, walk, climb and swim. Unfortunately, in too many cases, this essential stabilizing structure is also our weakest link.
To bolster this support system, physical therapists recommend what they call "lumbar stabilization," or "core training" exercises. These moves target your torso from your shoulders to your hips, especially the ab, oblique and back muscles. When performing these exercises, be sure to keep a neutral spine. You shouldn't arch, sway or deliberately try to flatten your back. Rather, maintain a natural spinal curve that is comfortable. Perform two sets of the following exercises, two to three days a week, but not on consecutive days.
THE HOVER. Lie facedown on the floor with your upper body propped on your forearms with your elbows directly beneath your shoulders. Your torso should be up off the floor so your body is in a straight line, supported by your forearms and toes. Your back should not arch or droop. Hold 10 to 20 seconds.
SIDE PLANK. Lie facedown on the floor with your upper body propped on your forearms with your elbows directly beneath your shoulders (as in the hover). Roll your body over to the right side, supporting your torso on your right forearm and raising your hips and stacking your feet so your body forms a straight plank. Put your left hand on your hip. Hold five to 10 seconds. Then switch sides.
ROLL LIKE A BALL. Sit on the floor and hug your knees to your chest. Balance on your tailbone and lift your feet, pointing your toes down toward the floor. Pull your abdominal muscles in and roll back onto your upper glutes and lower back. Contract your abs and pull yourself back to start. If the move is too difficult, loosen your arms, so your knees are pulled less tightly to your body. Perform 10 rolls.
LYING LEG DROP. Lie on your back with your hands behind your head and your legs extended and lifted directly over your hips so they are perpendicular to the floor. Turn feet out slightly. Lift your head off the floor and look toward your legs. Inhale and lower your legs toward the floor about six inches. Exhale, and return to start. Start with four reps, and then work up to eight.
TORSO LIFT. Lie facedown on the floor with your hands under your chin, palms down, and elbows pointed out to the sides. Keeping your hips pressed to the floor, lift your head, chest and arms about five to six inches off the floor. Pause, then lower. Repeat for eight to 10 reps.
Loosen Up
Strength without flexibility is like chips without the fish--only half the story. For pain-free diving, concentrate not just on stretching the usual suspects like the hamstrings and calves, but also the muscles that need to be flexible for finning, advises sports conditioning coach Harvey Newton, creator of the book and video set Explosive Lifting for Sports (Human Kinetics, 2002). "People automatically flex forward, as in touching their toes, when they stretch. But scuba diving puts you in the reverse position, with your feet floating up, so your body forms a U in the opposite direction," he says. "If you're not conditioned for that, you can end up pretty sore by the end of your dive." The following stretches will help. Perform each stretch twice, holding for 30 seconds. You can perform these every day.
COBRA. Lie facedown with your feet together, toes pointed and your hands on the floor, palms down, just in front of your shoulders. Lift your chin and gently extend your arms, lifting your upper body off the floor as far as comfortably possible. If you feel any strain in your back, alter the pose so that you keep your elbows bent and forearms on the floor. This move targets the thigh, front hip and abdominal muscles.
FIGURE 4 BEND. Sit in a chair with your legs bent 90 degrees and feet flat on the floor. Cross your right ankle over your left knee, so your calf is parallel to the floor and your right knee is pointing to the right. Keeping your back straight, lean forward from the hips until you feel a stretch deep in your right glute muscle. This move stretches the piriformis, a small muscle that runs from the base of the spine and connects to the thighbone.
LUNGE STRETCH. Get in the lunge position, with your right leg bent 90 degrees in front of you and your left leg extended behind you with the knee resting on the floor. Your torso should be upright. Keeping your back straight, press your body forward so you feel a stretch in the front of your hip. Hold; then repeat on the opposite side. This stretches the psoas, the muscle that connects your back with the front of your hip.
Watch Your Back
To keep the chiropractor at bay, use these techniques when lifting and carrying heavy gear.

|
| Illustration by Thomas-Bradley Illustration & Design.|
> Cradle the load. Carry equipment as close to your body as possible. Instead of trying to strong-arm your tank with one hand, lift it with both hands and carry it across your chest in both arms like a baby.
> Lift with your legs. Bend from your legs and pick things up using your strong quad, hamstring and glute muscles. Don't bend from the waist and hoist things with your back.
> Wear the weight. The easiest, and safest, way to carry your tank, BC and weight belt is wearing them.
> Integrate it. If your buoyancy check shows you need lots of weight, consider a BC with integrated weights to disperse the load.
> Buddy up. Rather than using the sling-and-struggle method to don your BC, ask your buddy to hold it, so you can put both arms in and settle it before bearing the load. If your buddy is unavailable, place the tank on a bench for support.
> Undress in the drink. If you're susceptible to back woes, take your gear off in the water and hand it up to someone on the boat before reboarding.